
Milgard Windows Review: Are They Worth It for Bay Area Homes?
Lots of people here in the Bay Area got their opinions about windows today. Somebody always says Milgard. Somebody else swears by Andersen. And then there’s that one guy who read three Reddit threads and now thinks he’s a building scientist.
So let’s actually break it down. Just real talk about Milgard windows and whether they’re worth it for Bay Area homes.
Buying new windows isn’t about doing a simple cosmetic upgrade. It’s about defining comfort, resale value, and energy bills for decades.
Milgard Windows Overview: A Window Manufacturer People Trust For A Reason
So first things first. In any serious Milgard windows review, people talk about reputation.
It’s genuine West Coast manufacturing. In the Bay Area it means a lot because supply chains are tighter and dealer support tends to be stronger. What do San Francisco contractors usually say? For them Milgard means consistent and reliable quality..
Vinyl windows, fiberglass windows, aluminum, wood-clad options — they do it all. From what we’ve seen the quality remained decent in every project they’ve been working on. They’re familiar enough with Tuscany Series, Ultra Series, Essence Series, and Trinsic Series Milgard lines.
We recommend Milgard windows if you consider putting modern replacement windows into old aluminum frames. The overall window quality is solid for the price point. Those aren’t ultra-luxury ones, but definitely not bargain-bin either.
When homeowners ask, “are Milgard windows good” most local professionals say yes. They’re tested by California weather well enough.
Common Milgard Windows Complaints and Real Issues
Now, let’s not pretend it’s all sunshine. You can easily find Milgard windows complaints on sites like Consumer Affairs. Some customer reviews mention delayed service calls, occasional hardware issues, or cosmetic concerns like frame discoloration over time.
But here’s one thing. A huge chunk of negative feedback circles back to installation quality.
If a contractor messes up flashing, leveling, or sealing during window installation, you’ll get drafts, leaks, and performance problems. That’s not about the window manufacturer at all.
True manufacturing defects? They exist, sure. Though most Milgard windows complaints are tied to installer performance, not core product quality.
That distinction matters a lot.
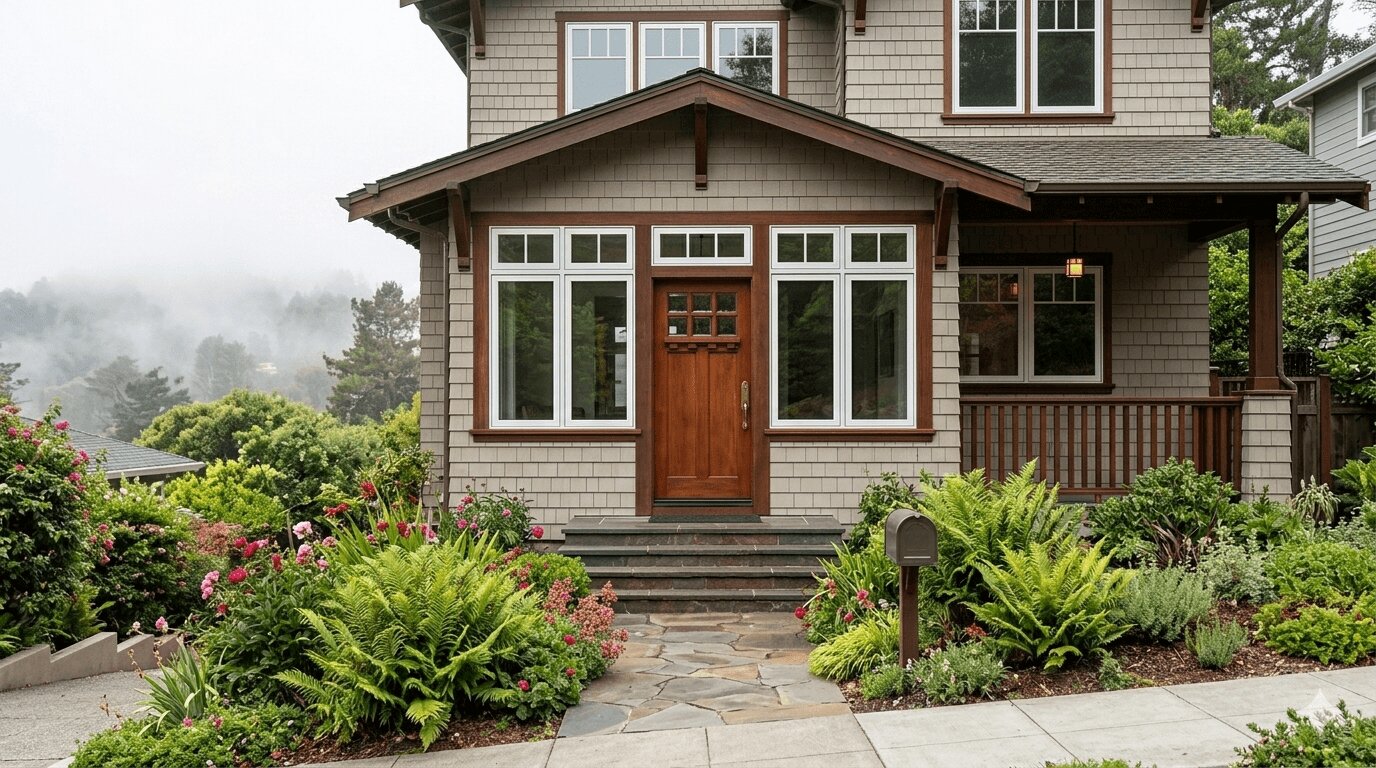
Milgard’s Best Window Series: Which to Choose
You’re probably asking: what is the best Milgard window for Bay Area homes? Let’s take a closer look at what the brand offers.
Tuscany Series
The Tuscany Series is their vinyl windows flagship line. Good value. Reliable seals. Strong all-around window performance. For a lot of homeowners, this is the best Milgard window for balancing price and performance.
Ultra Series
The Ultra Series uses fiberglass. These fiberglass windows are durable and withstand temperature swings easily. Inland California homes with hotter summers often lean this way.
Trinsic Series
The Trinsic Series gives you slimmer frames and more glass area. That’s kind of that modern look people want in new builds.
Essence Series
The Essence Series pairs wood interior with fiberglass exterior. You get the warm aesthetic inside, durability outside.
And if you live near a freeway, Milgard’s Quiet Line option improves sound insulation, which in dense Bay Area neighborhoods is honestly underrated. As you can see, each window series fits different budgets and microclimates.
Energy Efficiency and Bay Area Climate Performance
Now let’s talk about energy efficiency, because California can rip out your wallet alright if you ain’t careful enough.
Most Milgard windows come with Low-E glass options and can be filled with argon gas for better thermal performance. Many configurations meet Title 24 requirements.
When comparing numbers, check the U-factor and SHGC ratings. Lower U-factor means better insulation. Balanced SHGC helps control heat gain. In coastal zones with fog and mild temperatures, properly installed vinyl windows perform well. Inland areas benefit from fiberglass stability.
Compared to Andersen windows and Pella windows, Milgard competes strongly in mid-tier efficiency. Premium Andersen windows may edge them out at the top end, but at higher cost. Overall, Milgard windows deliver good performance in varied California climates when installed right.
Milgard Warranty: What’s Actually Covered
The Milgard warranty is a big selling point.
They offer a Full Lifetime Warranty, covering manufacturing defects, certain hardware failures, and even glass breakage in many cases. That’s meaningful warranty coverage.
Here’s the key point. The Milgard warranty typically doesn’t cover poor installation. That’s where using a certified dealer matters. A certified dealer ensures installation follows factory standards, which protects both performance and warranty validity.
Real-world customer reviews show smoother claims when windows were installed by approved pros.
Milgard vs. Competitors: Value for Bay Area Homeowners
So how does Milgard stack up? Compared to Andersen windows, Milgard is generally more affordable. Against Pella windows, pricing is competitive in vinyl categories. For replacement windows in the Bay Area, Milgard often hits the sweet spot: solid window quality, good energy efficiency, and strong regional support.
When people ask us “are Milgard windows good” the answer is yes. Especially for homeowners who want durable windows without paying ultra-premium pricing. Milgards are practical, reliable, and regionally optimized.
Choosing a Certified Milgard Dealer in the Bay Area
Now here’s the part people usually skip.
The product matters. But the certified dealer matters a lot too. A good installer ensures precise window installation, proper flashing, sealing, and alignment. Other installers can’t guarantee installation quality this good and it can make even top-tier windows underperform.
When vetting a contractor in the Bay Area, ask about licensing, insurance, experience with specific Milgard windows lines, and past projects in San Francisco. Because at the end of the day, long-term window performance depends just as much on the crew as on the frame.
Milgard windows deliver dependable performance, solid energy efficiency, and strong warranty coverage when installed correctly. They’re not flawless. No brand is. But for most Bay Area homeowners replacing aging units with modern replacement windows, they represent a practical and respected choice.
If you hear an unusual rattling sound when the wind hits your house that ain’t ghosts. That’s your windows asking for help. Most people ignore it. Then one storm rolls through San Francisco, the panes start shaking, and suddenly everybody’s Googling “how to fix rattling windows” at midnight.
Windows start making noise long before they fail. Small gaps, loose parts, or shifting frames cause vibration that grows louder over time. Some fixes are simple weekend work. Others point to deeper structural problems worth addressing early.
Opening Brief: What’s Actually Going On
Rattling windows usually happen because something’s loose. Worn weatherstripping, aging window frames, slack window hardware, maybe a drifting window sash that’s not sitting tight anymore.
In the Bay Area and older San Francisco neighborhoods you’ve got a little settling foundation action, some salty air, steady coastal winds, and that’s it — you get your windows rattling in the wind.
Most of the time you can fix rattling with targeted window repair. Sometimes it’s a bigger problem, though.
Why Windows Rattle: Common Causes in Bay Area Homes
First off, worn-out weatherstripping can be the reason. Once it compresses and flakes out, you get air leaks. Those leaks create drafts. Drafts mean movement.
Second, loose window sash components. Especially in older double-hung windows. That sash should sit firm inside the window frames. When it doesn’t, you get to deal with the rattling.
And don’t forget sliding windows. If the rollers wear down or the track is off, you get rattling sliding windows every time the wind shifts.
In some San Francisco homes, deteriorated glazing compound around the glass contributes to window rattling too.
Add strong coastal winds, and suddenly minor looseness turns into real window noise.
Quick DIY Fixes for Rattling Windows
Now let’s talk about DIY solutions. Start with new weatherstripping. Cheap, effective. Foam tape works fine for small gaps. For vertical edges, try V-strip weatherstripping. It holds tighter over time.
Check your window hardware. Tighten screws. Inspect the window sash. Adjust those sash locks on double-hung windows so everything clamps down properly.
For rattling sliding windows, clean the tracks and check alignment. Sometimes adding window inserts or basic draft stoppers can stop windows from rattling instantly.
A coffee break job. Though usually it works.
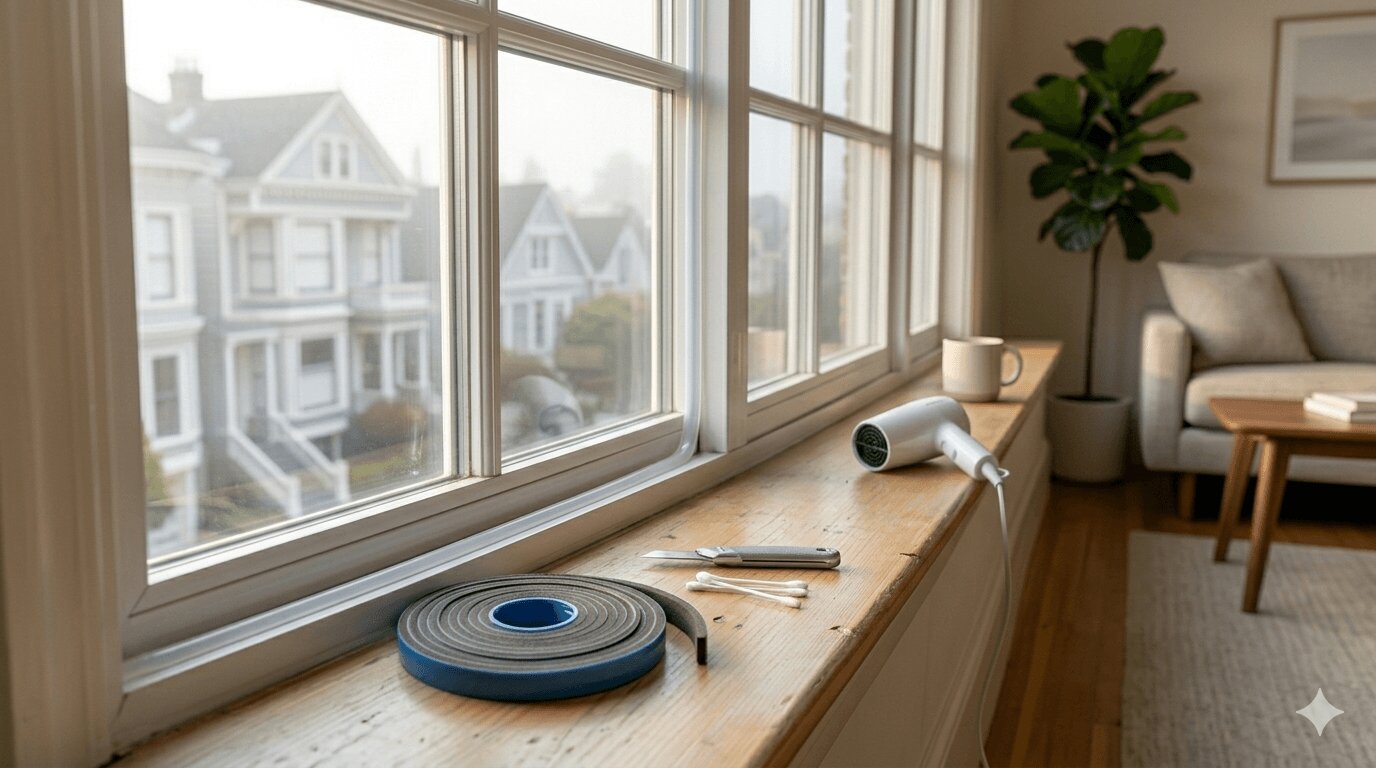
Weatherstripping Solutions That Actually Help
Not all weatherstripping is equal. In the Bay Area climate with all those foggy mornings, and hot afternoons cheap materials break down in no time.
Silicone-based weatherstripping lasts longer. Good compression reduces air leaks and improves energy efficiency. That means fewer drafts, less window noise, better comfort.
Apply it where the window sash meets the frame. Measure carefully. Too thick, and your window won’t close. Too thin, and you didn’t really fix rattling.
Done right, it even helps with mild noise reduction when you’ve got windows vibrating during a storm.
When Rattling Means Bigger Trouble
Now here’s the serious part.
If you’ve got visible gaps, moisture between panes, or signs of moisture damage, that’s not just basic rattling windows anymore.
Look for rotting frames, persistent loose windows, or sticking tracks in sliding windows. Those are potential structural issues.
If repeated window repair attempts don’t hold, and you’re constantly trying to stop windows from rattling, it may be time to ask bigger questions.
Professional Repair vs. Window Replacement
Professional window repair usually gives better results in replacing weatherstripping, reinforcing window frames, and tightening components if you don’t have much experience in fixing things.
If the energy efficiency of your house is suffering then full window replacement starts making sense. Heating bills getting expensive is a common sign of trouble.
Modern vinyl windows seal tighter. Quality systems reduce window rattling long-term. Proper professional installation matters more than people think. A certified installer will usually provide a free estimate, evaluate the noise source, and explain whether targeted window repair or complete window replacement makes more financial sense.
In San Francisco, with aging housing stock, that conversation happens a lot.
Choosing Rattle-Resistant Windows
If replacement’s the call, look for sturdy vinyl windows or solid fiberglass frames. Good locking systems secure the window sash firmly. Proper sizing during professional installation prevents future loose windows.
Brands like Milgard build systems designed for durability and strong energy efficiency. A reliable window warranty covering operational issues gives peace of mind too. Quality materials plus accurate install? That’s how you avoid this conversation again in five or more years.
Bay Area Climate Considerations
The Bay Area isn’t gentle on houses. San Francisco fog, inland heat shifts, and steady coastal winds test every joint and seal. Homes near the water experience stronger pressure differences, which amplifies window rattling.
Proper sealing and anchoring during window replacement are critical in high-wind zones. Sloppy install means repeat problems. So when someone asks how to stop the noise for good, the honest answer is simple — secure structure, quality materials, tight weatherstripping, and precise fit.
If your place has rattling windows, don’t ignore it. Small fixes often solve it fast. But when vibration keeps coming back, or when window noise turns into noticeable drafts, that’s when window replacement deserves consideration.
In the Bay Area staying ahead of these issues protects comfort, improves energy efficiency, and keeps your place safe Check your windows before the next storm rolls through.
When you look at a random window and see the draft coming off the glass it means one thing: bad window U factor.
A simple fact is the “good U factor for windows” ain’t just contractor jargon. It’s the number that decides whether your place in the Bay Area feels tight and cozy or like a mountain cabin with the door stuck open in November.
There’s this tiny number stamped on modern windows that quietly runs your heating bill behind your back. It affects comfort, costs, and how hard your system works. Most people don’t notice it until they’re shivering. More details in this friendly guide.
What Is U-Factor and Why Does It Matter for Windows?
When people type “what is u factor in windows” in search bars they expect simple answers.
So, in simple words, the U factor for windows measures heat transfer. That’s how fast warmth moves through the glass and frame and escapes outside. Lower number? Less heat loss. Better thermal performance. Stronger energy efficiency.
Simple. Mostly.
Now in the Bay Area, especially San Francisco where that fog just slides in like it owns the place, the U factor in windows becomes really important. You don’t want that heat you paid for drifting out over the Pacific.
With R-value things go completely different. With R-value, higher’s better. With a U factor rating, lower is better. Opposites.
U-Factor Scale and Rating System Explained
Typical U factor rating runs from about 0.20 up to 1.20 for residential spaces. That scale comes from the official NFRC rating system. They standardize these energy ratings so what you see in California means the same anywhere else.
If the window U factor rating says 0.28 that’s solid. Windows U factor is pushing 0.80? That’s older tech. More heat transfer, less control.
The U-factor for windows basically tells you how disciplined that window is about keeping warmth inside. Lower numbers, better window performance. Period.
What Is a Good U-Factor for Bay Area Windows?
Now let’s answer the big one — “what is a good U factor for windows” in the Bay Area?
For most of the Bay Area, especially near San Francisco, you’ll find 0.25 to 0.30 or lower. That’s a good U factor for windows in Northern California.
That lines up with Title 24 standards, which California enforces pretty tight. Different climate zones mean slightly different requirements, but generally, lower is safer.
Brands like Milgard design products specifically to meet Title 24 in California. Coastal fog in San Francisco ain’t the same as inland heat, but the right U factor window handles both without any issues.

U-Factor vs SHGC: Understanding Both Energy Ratings Together
Now, let’s talk about U factor and SHGC.
The U factor for windows measures heat loss. SHGC stands for Solar Heat Gain Coefficient. It measures how much sun heat comes in.
In the Bay Area, balancing U factor and SHGC matters big time. You want low window U factor for winter warmth retention, but you also gotta manage SHGC so summer sun doesn’t cook the place.
Modern windows use Low-E coatings to juggle both sides. Better window performance, stronger energy efficiency, controlled solar gain.
Factors That Affect Window U-Factor Performance
First factor: glass layers. Double-pane windows already improve insulation a lot. Triple-pane windows go further: more separation, less heat transfer, better thermal performance.
Then there are gas fills between panes. Argon gas is the common option. Krypton gas is denser, performs even better. Both reduce heat movement.
Add Low-E coatings, and now the surface reflects infrared energy back inside where it belongs.
Frame counts too. Frame materials like vinyl windows and fiberglass windows generally outperform older metal frames in overall window performance.
All the aforementioned ingredients combine into that final window U factor rating number.
How U-Factor Impacts Energy Bills and Home Comfort
Speaking about money. Imagine you’ve got older windows with a U factor rating around 0.90. That’s a huge heat loss. Upgrade to something with a window U factor around 0.28 and you get real energy savings.
Lower U factor in windows boosts HVAC efficiency, cuts strain on your system, trims energy bills, and reduces overall utility costs. It also helps with condensation prevention. It matters a lot in damp San Francisco mornings.
Across the Bay Area, smart window replacement projects pay back through lower energy bills and improved home comfort. That’s not hype. That’s math.
Choosing the Right U-Factor Rating for Your Bay Area Home
It ain’t like just picking the lowest number and calling it a day.
Orientation matters. South-facing glass in sunny California neighborhoods needs careful SHGC planning. Shadier spots near the coast focus more on minimizing heat loss.
Budget matters too. High-end systems offer incredible thermal performance, but strong mid-range units still deliver decent energy efficiency.
That’s where Window Replacement Center comes in. We’re certified Milgard dealers. Window Replacement Center helps Bay Area homeowners match the right window U factor to their property.
Now when someone asks again, “what is U factor in windows”, you’ll know it’s the backbone of a window’s energy ratings and real-world performance.
FAQ
Is a higher or lower U-factor better for window energy efficiency?
Lower window U factor means less heat escapes and the energy efficiency is better.
What’s the minimum U-factor required by California Title 24 for windows?
Depends on local climate zones, but most Bay Area regions require around 0.30 or below under Title 24.
How much can I save on energy bills with low U-factor windows in San Francisco?
Depends on home size and condition, but lots of people see noticeable energy savings and reduced energy bills.
Do triple-pane windows always have better U-factor ratings than double-pane?
Usually yes, though advanced Low-E coatings and optimized gas fills can make high-quality double-pane systems competitive.
What’s the relationship between U-factor and R-value in window performance?
They measure insulation differently. Lower U factor rating equals higher effective R-value, meaning better resistance to heat movement.
A right set of French doors can change the whole place. The room gets more light, flow, vibe. The boxed-in dystopia energy disappears. But here’s the thing people usually don’t think about: if the install is sloppy, you’ll feel it every single winter when the fog rolls in.
Upgrading to double doors isn’t just an aesthetic job. It’s framing, leveling, sealing, and making sure the structure plays nice long term. Do it right and you get both atmosphere and performance. Do it wrong and you get drafts, sticking panels, and regret.
French door installation usually takes 4 to 8 hours. For DIY people it might take a full weekend. In the Bay Area climate proper installation matters a lot for energy efficiency, durability, and security. Installation costs vary depending on structure, door type, and modifications needed.
French Door Installation: What Bay Area Homeowners Need to Know
Here’s how French door installation actually goes. You remove the old unit first, doing full door replacement or maybe opening a wall. Then you prepare the rough opening. That’s the framed cavity where the new unit sits. If that opening’s off, your whole door installation goes sideways.
Most units come as prehung doors, meaning the French door panels are already mounted inside a factory-built door frame. That saves time and improves alignment if the framing’s right.
Now in the Bay Area, especially San Francisco, you’ve got a lot to keep in mind. Seismic requirements. Moisture exposure. Sometimes local permit requirements if you’re changing structure. That’s not optional stuff.
The unit has to be perfectly level and plumb. We’ve seen people skipping that and regretting it for a decade later.
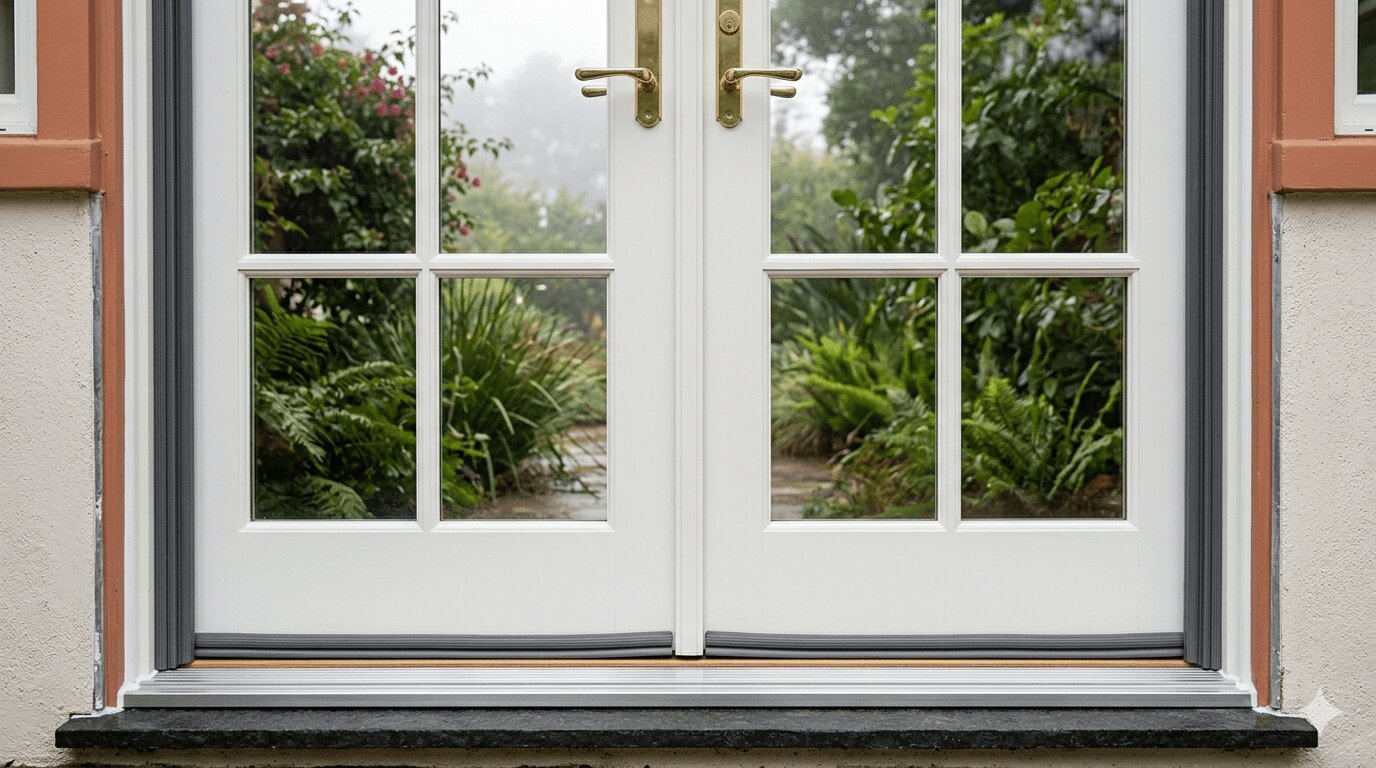
Interior vs. Exterior French Door Installation Requirements
Interior French doors look nice almost anywhere. No hardcore weatherproofing, lighter framing load, mostly aesthetic separation between rooms. Good for offices, dining rooms, whatever needs light.
It’s not that easy with exterior French doors, though.
You have to install a proper threshold, integrate flashing, add continuous weatherstripping, and seal everything for real. If something’s wrong all the honest work turns into water intrusion.
Compared to sliding patio doors, hinged French doors feel classic, but alignment matters more. Exterior units especially need reinforced anchoring in the door frame to hold up against wind pressure. Installing French doors outside always means precision work.
DIY French Door Installation: Is It Right for You?
Let’s talk about DIY installation. If you’re swapping same-size units and you know your way around a circular saw, drill, and level it could work out fine. Straightforward door replacement, no wall expansion, something like this.
But installing French doors means getting the rough opening perfect, placing the unit, adjusting with shims, confirming it’s totally level and plumb, securing it without warping the door frame. Mess up the alignment and your French doors won’t close right. Or they’ll stick every humid morning.
For exterior projects, professional installation means peace of mind. Especially in the Bay Area where moisture and movement test everything.
Professional French Door Installation Process
When certified installers show up, there’s a rhythm to it. They inspect the rough opening. Confirm measurements. Assess structure. Then they remove the old unit. Make sure the framing is clean.
Then doors are set into the opening. Alignment is checked and adjusted with precision. Installers make sure everything’s level and plumb. Then comes perimeter insulation, sealing gaps, applying weatherstripping, and exterior flashing for water control. Good caulking seals edges cleanly.
The final part is installing door hardware, operation testing, trim installation, swing checking, and testing locks. An experienced contractor runs this installation process methodically. That’s the difference between smooth doors and constant micro-adjustments.
French Door Installation Costs in the San Francisco Bay Area
In the Bay Area, installation costs vary. Interior jobs may cost $600–$3,000. Exterior jobs around $1,500–$10,000. Labor and materials included. Yes, labor costs in San Francisco can be unsettling.
Materials matter. Stock wood doors usually cost less than high-end fiberglass doors, which offer better durability and insulation. Custom units raise overall installation costs again.
Structural expansion? More framing, maybe engineer sign-off, definitely higher pricing. If you’re installing French doors as part of a bigger remodel, bundling work can reduce per-unit impact. Smart budgeting.
Common Installation Mistakes That Cause Problems
We’ve seen it too many times. Bad measurements on the rough opening. Skipping full structural anchoring of the door frame. Weak weatherproofing on exterior French doors.
Improper flashing details.
All that leads to air leaks, water intrusion, sticking hinges, compromised energy efficiency, and sometimes voided warranty coverage.Never rush with door installation without checking swing clearance. Installing French doors isn’t complicated, but it is precise.
Ensuring Energy Efficiency and Security During Installation
If you’re going to install French doors, do it right.
Perimeter insulation reduces air gaps. Proper weatherstripping blocks drafts. Correct orientation of low-E glass supports energy efficiency and meets California Title 24 standards.
For security, solid strike plates and reinforced door hardware matter. Many modern units include multi-point locks, which dramatically improve security features on exterior French doors.
Professional installation ensures all of that is integrated properly and not just bolted in place. Whether you’re upgrading interior French doors for flow or replacing sliding patio doors with something more classic, the quality of your French door installation determines everything.
In the Bay Area, with shifting ground and moisture in the mix, cutting corners on installation costs more later. A reliable contractor or experienced certified installer keeps it clean and durable.
Caulking windows seems to be a waste of time until you notice dark patches of mold in your room. The problem is when you see them it’s already too late — their spores are in your lungs. Caulking windows properly is the way to prevent damage that doesn’t show up until it’s inconvenient. Or expensive.
Drafts, water infiltration, energy loss — just a bunch of words when caulking is done right. Sloppy job traps moisture and accelerates damage. We know how and when to recaulk windows, where to apply sealant properly, and how Bay Area climate conditions affect everything. We’re also eager to share our knowledge.
When Your Windows Need Recaulking
Cracks. Peeling caulk. Slight separation between window frames and trim. These are not decorative features. They are signs of caulk failure. A small crack along a frame can mean more than cosmetic wear. Moisture, slow deterioration. Older coastal homes need extra care.
Drafts near closed windows? Air leaks are already slipping through damaged seals. San Francisco is all about fog exposure and temperature shifts — exterior window caulking gets extra damage. UV exposure also weakens window sealant over time.
Water infiltration is way worse. Discoloration, damp drywall, swelling around window trim — those are signs of moisture protection wear. It leads to moisture damage inside the wall cavity. Quietly.
Most exterior caulk lasts five to ten years depending on material. Silicone caulk generally outperforms latex caulk in longevity, while polyurethane caulk offers durability with impressive flexibility. But even high-quality exterior caulk eventually breaks down. Recaulking windows becomes necessary when visible gaps form, not when total failure happens.
There is a point where recaulking windows is no longer enough. If window frames are warped, or repeated drafts persist despite window sealing attempts, window replacement may be the more practical solution. In older Bay Area properties, this decision comes up more often than expected.
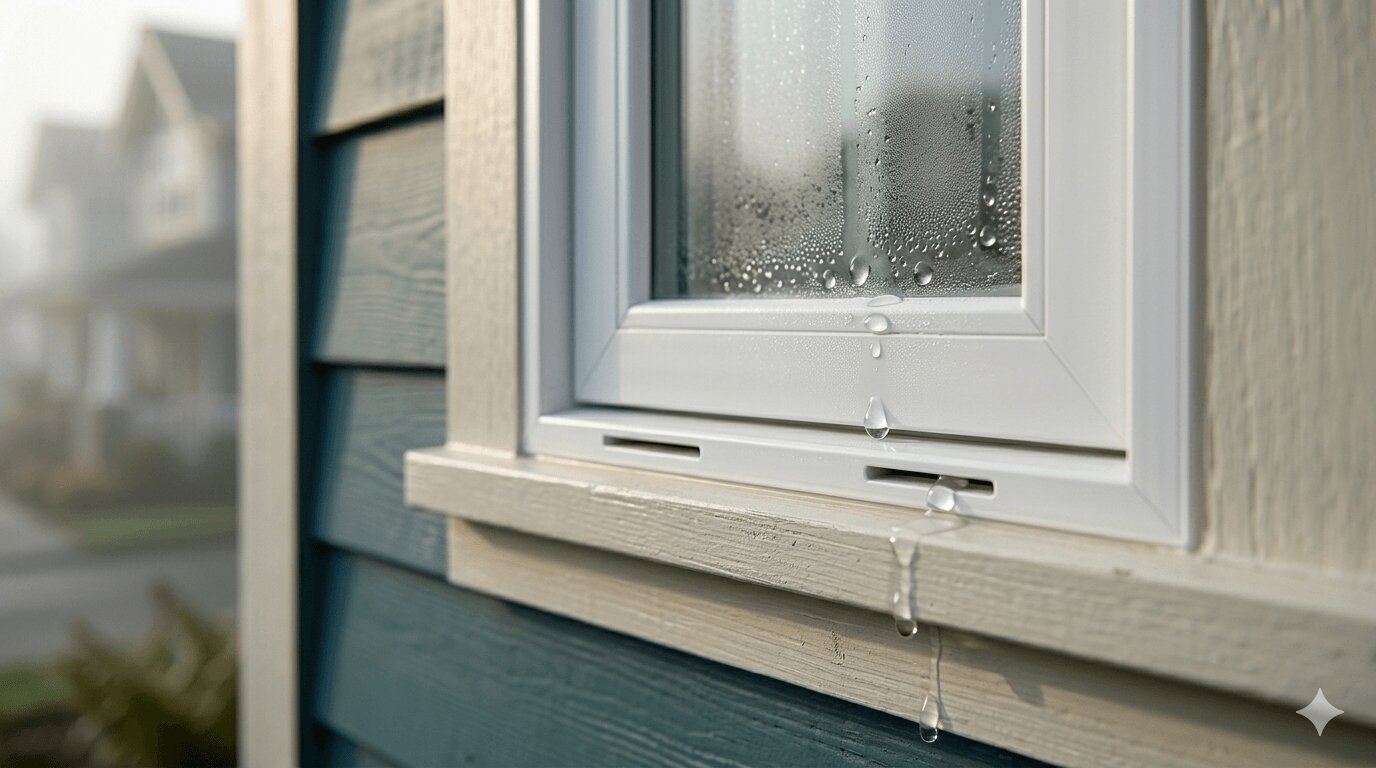
Proper Ways To Caulk Around Windows
Exterior window caulking means sealing the window perimeter where the frame meets siding. Caulking around windows in these transition areas helps prevent water infiltration and air leaks.
Joints in window frames themselves may also require window caulk, especially at corner seams. Small gaps around window trim can be sealed to improve weatherproofing. The goal is controlled sealing, not over-application.
Now, the part many homeowners get wrong. Weep holes.
They exist at the bottom of many window systems to allow trapped water to drain. Blocking weep holes during caulking outdoor windows traps moisture inside the frame assembly. It leads to rot, swelling, and premature window replacement. It happens often. It is avoidable.
Never caulk the bottom edge of certain window designs unless manufacturer guidance specifically allows it. Exterior window caulking should never interfere with drainage paths. In San Francisco’s damp climate, improper caulk exterior windows methods can accelerate wear. Your goal is preventing it.
Thoughtful window maintenance means knowing when not to apply sealant. More caulk does not equal better window sealing. Sometimes restraint protects the structure more effectively.
Top-tier Caulk Types for Exterior Windows
Choosing the right material for caulking windows in the Bay Area is easy. Climate matters, though.
Silicone caulk offers superior UV resistance and flexibility, making it a decent choice for exterior caulk applications exposed to sun and fog. It sticks properly to vinyl and aluminum window frames. It isn’t paintable usually — no aesthetic adjustments are possible.
Latex caulk is easier to apply and clean. Though silicone is much more durable. It may work for interior window sealing, but caulking outdoor windows in coastal air? Not really.
Polyurethane caulk means top adhesion for wood frames and it’s also very durable. Moisture protection and elasticity are also guaranteed. It requires more careful caulk application and longer curing time, though — especially in coastal humidity.
Hybrid window sealant products combine silicone and polyurethane properties. They do well for exterior window caulking if you need both durability and paint compatibility.
For balanced wood window trim performance look for polyurethane or hybrid products. Vinyl frames often pair best with silicone caulk. Aluminum frames marry perfectly with high-adhesion silicone and specialized exterior caulk products designed for metal bonding.
Proper caulking technique matters as much as product choice. Surfaces must be dry. Old caulk should be removed fully before applying fresh material. Using a quality caulk gun ensures consistent bead control. Smooth the bead for proper sealing and uniform contact with surfaces.
Rushing curing time in fog-heavy weather compromises results. Allow full curing before exposure to heavy moisture. In the Bay Area, that sometimes requires patience.
Window sealing should enhance energy efficiency and structural stability. It should not merely look tidy for a season.
FAQ
How often should I recaulk my windows in San Francisco?
In San Francisco, recaulking windows is usually needed every five or seven years. It depends on your windows quality, sealant quality, fog exposure – a coastal house needs it done more often. Just check the caulking from time to time. Gaps and tiny fractures are maintenance flags.
What’s the best caulk for exterior windows in foggy weather?
Silicone caulk or hybrid exterior caulk products are top-tier options. They grant superior UV resistance and flexibility. It matters a lot in coastal areas. These materials maintain adhesion despite temperature swings and moisture. The Bay Area has plenty of both.
Should I caulk the bottom of my window frame?
Not if you see weep holes there. Blocking them blocks drainage and it leads to moisture damage. Exterior window caulking shouldn’t block any water, keep that in mind.
Can I caulk over the old caulk or do I need to remove it first?
You need it fully removed. Only after that new window caulk can be applied. Layering over deteriorated material gives no adhesion and it’s no good at all. Clean surfaces ensure proper sealing and longer performance.
When should I replace windows instead of just recaulking?
If drafts persist, frames show structural damage, or repeated caulking around windows fails to improve performance, window replacement may be necessary. Constant air leaks and deteriorating materials can be signs of frame or window wear beyond simple recaulk windows efforts.
People usually think swapping out a window is a simple job. But somewhere between that old frame and the studs hiding in your walls, the choice gets real expensive real quick. Pick the wrong option and you’ll feel it every winter when that wind comes slipping through like it owns the place.
Speaking about retrofit vs new construction windows comparison, the key difference is how deep you want to cut into your house. The more changes you want the more obvious one of two options gets. The whole retrofit vs new construction debate comes down to either keeping the old window frame, or pulling it clean out and installing the new one.
Understanding Retrofit and New Construction Windows
Here’s the backbone of it. Retrofit windows, sometimes called replacement windows, slide into your existing frame. You leave that old window frame sitting there long as it’s solid. No tearing up siding. No busting up drywall unless something’s wrong.
New construction windows, though, come with a nail fin wrapped around the edges. That nail fin fastens straight to the studs. Means the old frame usually comes out. Means you’re openin’ up the window opening all the way down to the bones.
That’s the difference between new construction vs retrofit in a nutshell. One works with what’s there. The other starts from scratch.
What Are Retrofit Windows and How Do They Work?
Customers ask us sometimes about “what are retrofit windows”. They’re built for pocket replacement. That means the new unit fits inside the existing frame like it was made for it. You don’t disturb the exterior siding or the stucco. Around the Bay Area, that stucco ain’t something you want to get rid of if you don’t have to.
A flush fin retrofit window adds a slim outer lip that covers the edge of the old frame. Real handy with stucco homes. A block frame unit slides straight into the opening without that extra flange.
The beauty of retrofit window installation is how little mess it makes. The installation process usually leaves the exterior siding alone. Drywall stays mostly untouched. Trim stays put. For clean, straightforward window replacement, retrofit windows shine.
And when folks compare retrofit vs replacement windows, half the time they’re just mixing up terminology. Retrofit windows are a type of replacement windows. It’s about that installation method.
What Are New Construction Windows and When Are They Used
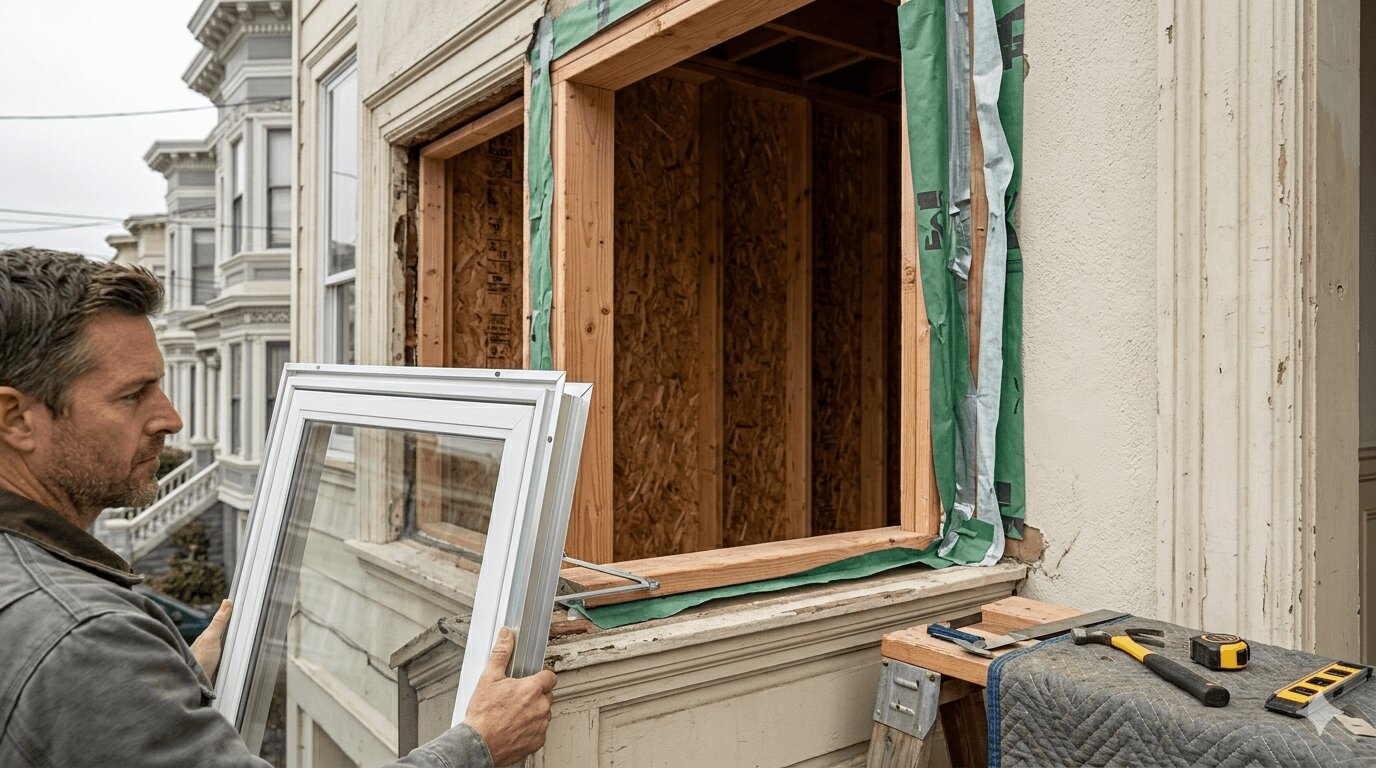
Now let’s talk about new construction windows. These come with that nail fin, and that nail fin attaches straight to studs after the old frame’s gone. During new construction window installation, you strip back siding or stucco, expose wall sheathing, tie in the moisture barrier proper for weatherproofing.
That means more labor costs. More time. More opportunity to fix hidden rot if it’s there. You use new construction windows for new builds, big remodeling jobs, or full frame replacement when the old window frame is shot. If the existing frame’s rotted or warped, retrofit windows ain’t gonna save you.
And if you’re changing the size of the window opening, maybe widening it for more light, you need new construction windows for that kind of design flexibility. That’s where new construction vs retrofit ain’t even a debate. Structure decides for you.
Cost Comparison: Retrofit vs. New Construction Installation
Let’s talk about dollars. The actual window units often cost about the same. Retrofit windows or new construction windows, doesn’t matter. But the installation cost? That’s where the split happens.
Retrofit window installation keeps labor costs lower. You’re not tearing off siding, not replacing trim all around, not messing with drywall much. New construction window installation costs more. Could be fifty to a hundred percent more. You’re pulling siding, patching stucco, replacing trim, sealing back up the moisture barrier. That full frame replacement adds up.
In any honest cost comparison, labor costs make the loudest noise.
Installation Process and Timeline Differences
Installing retrofit windows usually takes one to two hours apiece. It’s the whole house done in a day or two. That’s a gentle kind of home improvement since you can still cook dinner in peace.
New construction windows take more time. Three to four hours per window opening. The whole job might run three to five days, depending on siding repairs and weatherproofing work. The installation process is heavier. You’re dealing with studs, wall sheathing, siding replacement, and trim rebuilding.
If speed matters, retrofit windows win that round.
When to Choose Retrofit Windows for Your Project
Pick retrofit windows when your existing frame’s solid and square. If you’re not changing the size of the window opening and just want better energy efficiency, it’s a smart play.
For Bay Area homes preparing for sale, replacement windows through retrofit window installation boost curb appeal and resale value without the mess.
If you don’t wanna disturb siding or stucco retrofit windows are usually the smoother road.
When New Construction Windows Make Sense
If the existing window frame is rotted, or you’re in the middle of a big renovation or remodeling job, new construction windows are the right choice. Full frame replacement lets you inspect everything. Replace damaged studs if needed. Integrate flashing and moisture barrier right. That nail fin locks it all tight to the structure.
You also get maximum design flexibility. Bigger glass. Different shapes. New layouts. That’s something retrofit windows just can’t offer. For new builds in San Francisco or anywhere in the Bay Area, new construction windows are standard practice.
Energy Efficiency and Performance Considerations
Truth is, both window types can deliver strong energy efficiency. New construction window installation does offer superior weatherproofing because that nail fin integrates directly with studs and moisture barrier layers.
But retrofit windows can show excellent energy efficiency too. As long as the existing frame’s in good shape and the installation method is done right.
Good glass matters. Tight seals matter. A skilled window contractor matters most.
Making the Right Choice for Your Bay Area Home
In older San Francisco neighborhoods, people usually prefer retrofit windows to preserve original trim and architectural style. In full remodeling jobs, new construction windows often make more sense. Budget. Timeline. Structural condition. Those three things decide most cases.
Brands like Milgard offer strong lines for both retrofit windows and new construction windows, so product choice ain’t the limit but your house’s bones are. At the end of the day, the retrofit vs new construction windows question ain’t about which is better. It’s about what your home actually needs.
FAQ
Are retrofit windows as good as new construction windows?
They can be, if the existing frame is solid and retrofit window installation is done correctly.
Can I install new construction windows in an existing home?
Yes. Especially during renovation or full frame replacement projects.
How much does retrofit window installation cost compared to new construction?
Retrofit window installation usually carries lower installation cost and labor costs than new construction window installation.
Will retrofit windows fit my existing window openings?
They’re built specifically for that — designed to fit within the existing frame during window replacement.
Do new construction windows provide better energy efficiency than retrofit?
New construction windows may offer stronger structural sealing, but both window types can deliver excellent energy efficiency with proper window installation.